
Hi! My name is Veronica,
Today I’ll provide you Flow Hive reviews.
Bee hive with tap, automatic beehive, easy beehive, cedar beehive, beehive with spout, self draining bee hive, easy flow beehive, self harvesting beehive, autoflow beehive – it’s all about it.
As you may know from my previous beekeeper’s reviews, my parents are professional beekeepers and we owe apiaries for more than 20 years. My opinion is that professional beekeepers are not interested in a Flow Hive. Such a hive is not for commercial use, and the main reason is price. I’ve heard a lot of negative feedback, and mainly from the professional beekeepers and without a reference to concrete cons. Seriously, the hive has the right to life and finds its buyers, but a portrait of this buyer is not like the usual beekeeper. Flow Hive is for people who have no problems with money or have financial gain in beekeeping, but with the desire to have their own personal exclusively extracted honey, no matter what its cost. It’s like spinning for $800, which catches a trout for the family dinner. It is suitable for hobby and self-satisfaction, but it is not suitable for commercial fishing.
How does a Flow Hive work?
The key feature of a Flow Hive is not its design, but a Flow Frames Technology.
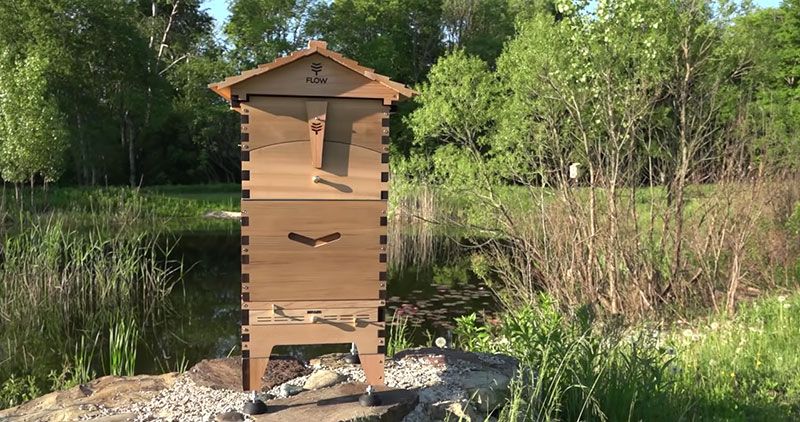
Flow Hive is just like any other Langstroth beehive which is the basic beehive you see all over the countryside – a box with frames in it that the bees live in.
A beehive basically consists of two parts – a bottom and a top. The bottom is called the brood box or the brood nest, that is where the bees and Queen live, where the Queen lays eggs and where the baby bees come from, where they hatch and taken care by the nurse bees. Also from the brood box bees fly in and out of the hive. The worker bees leave the hive from the bottom of the hive, they go out they gather nectar and pollen, then they come back in and fill the honeycomb with nectar, which they then convert into honey to feed the baby bees.
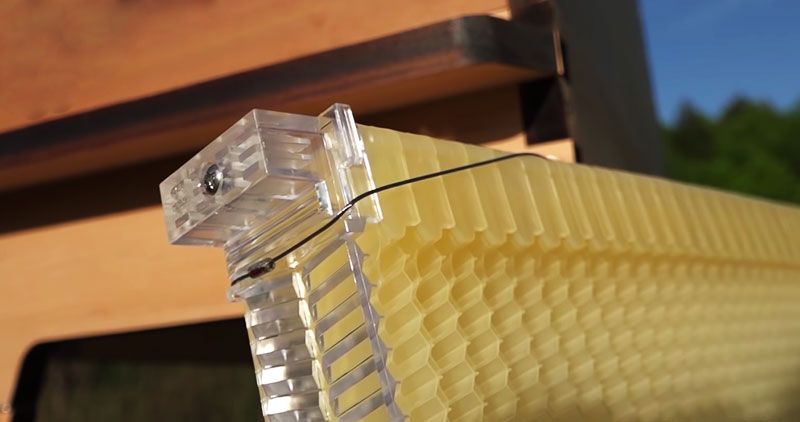
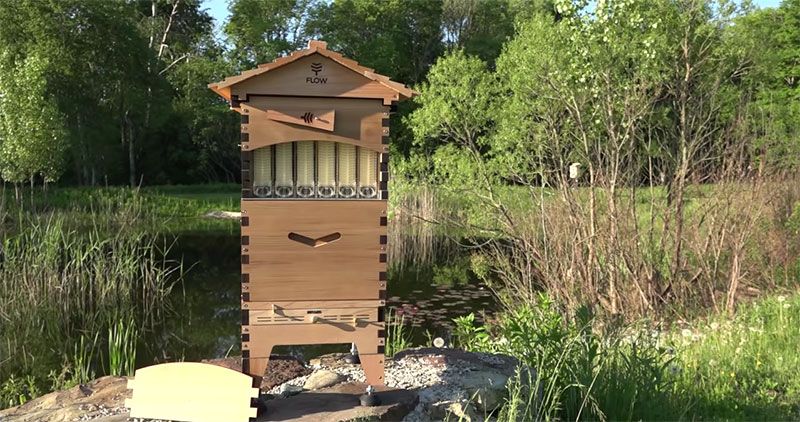
The top part of the hive is called the super – that’s where the honey goes. In a standard hive the frames on the super look just like the frames in the brood, they’re just standard wooden frames. It can be with or without foundation. The way of Flow Hive differs is a Flow Hive has the special frames which go into the top. These frames look like little honeycomb the bees are going to finish off and to fill them with nectar, then that turns to honey so you can harvest the honey right out of the box. In a standard hive, you have to remove the frames, take off the caps, get the honey out of the frames using honey extractor and then put them all back in there. On a Flow Frame, you can harvest the honey without taking the frames out of the hive. So harvesting honey without an extractor is the only way a Flow Hive differs from a regular hive.
What Flow Hive is the best?
Of course, there is only one certified Flow Hive, and you may say – what you’re talking about? And you will be right, but partly. Since it’s launch on the Indiegogo in 2015, Flow Hive has updated and now there two generations – Flow Hive Classic and Flow Hive 2. Also Flow Hive Hybrid is available. But first things first.
So, what criteria should be used to make a choice between Flow Hive modifications?
Full beehive or only the super?
If you are novice beekeeper, the full hive is the best option for you. It includes Flow Frames, Flow Super, and brood box. You just need to get bees and buy beekeeping protective gear (take into account, that bee veil is already included) and bee smoker. You don’t need to buy standard beehive kits, because usually, they included beekeeping tools that are useless in the case of Flow Hive, because, as I mentioned above, there is no need to remove frames, uncap cells, etc.
If you are experienced beekeeper, a complete Flow Hive with angled baseboard is the best choice. You can also add a Flow Super to your existing Langstroth hive or add Flow Frames to your current super. But consider the compatibility between Flow Frames and Langstroth equipment – 6 Flow Frame match the 8 frames Langstroth and 7 Flow Frame match 10 frames Langstroth.
Which Flow Hive model to choose?
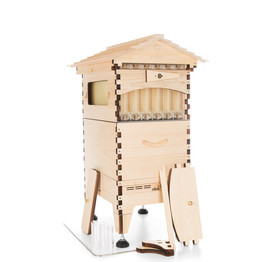
There are 3 main models – Flow Hive Classic, Flow Hive 2 and Flow Hive Hybrid.
Talking about Flow Hive Classic and Flow Hive 2, the principle of operation and technology are absolutely identical. The second generation has better usability, as Flow Hive designers took into account the main wishes and complaints of beekeepers who used the first generation beehive. Experienced beekeepers will appreciate ventilated tray cover, that will help with pest management.
Main differences between Flow Hive Classic and Flow Hive 2
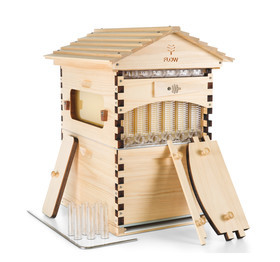
A few years ago there was a huge hype about the Flow Hive – a hive where we can drain the honey directly from taps. Meanwhile a Flow Hive 2 was presented. It has changed in comparison to the previous model a lot.
Let’s start at the top of the list.
- Flow Hive has managed it to put on both sides of the hive super an observation window.
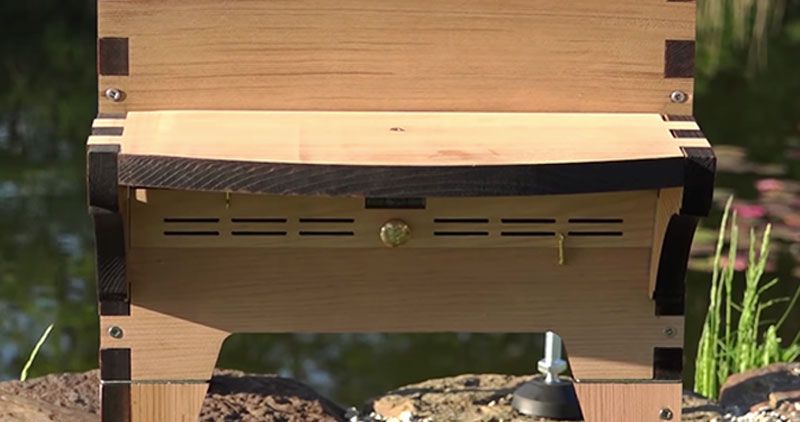
- With a Flow Hive 2 was introduced a system which allows regulating the air supply manually.
- Another innovation is the integrated stand. There’s a version with and without this feature. In the stands are integrated legs for optimal alignment. A practical add-on in my opinion. But I’m not sure if these little legs also carry a certain instability with them.
- The next optimization is the integrated table on which you can put the honey jars under the tap. The table can be adjusted in height.
- All holders, handles and knobs in the second version are made of brass.
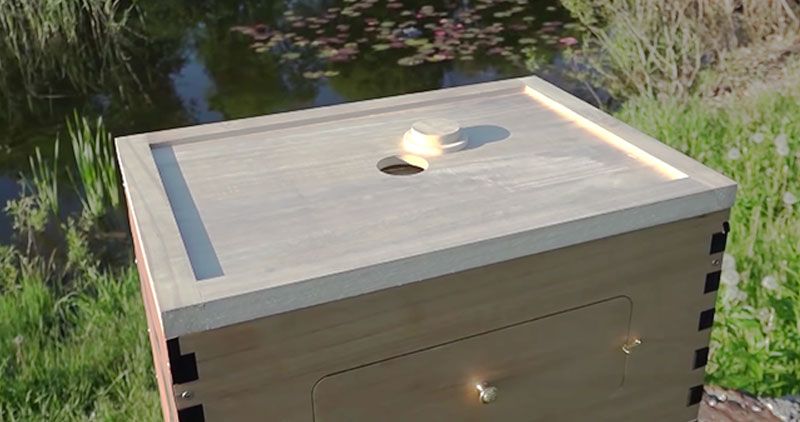
- Holding screws were integrated into the roof, which allows fixing the roof at stormy days.
- In my opinion, there are many good improvements. What I still lack in Flow Hive that is often seen is to drain honey without attracting bees. Another point is the price. It forces you to look at the whole thing as a toy from which you can buy one and put it in the garden to show friends and family what our hard-working girls do. As a major system for professionals, that’s way too expensive. But it’s nice to observe bees so undisturbed through the windows.
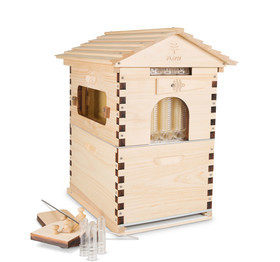
Flow Hive Hybrid include both Flow Frames and foundationless brood frames. The cool thing about hybrid hive is bees can create their own wax and natural comb as well, so you can get not only fresh honey but also delicious honeycomb. The side window allows to observe your bees building natural honeycomb, and the rear harvesting door allows to observe and harvest Flow Frames.
So if you just want to test the beehive or vice versa, make a gift (and assume that it will be used as backyard decoration), feel free to choose Flow Hive Classic.
Which timber to choose?
Flow beehives are offered in two timbers – Western Red Cedar and Araucaria.
Araucaria is Australian native hardwood timber. It’s better for personalizing hives (painting, pyrography, etc.) and also more economical. We recommend two coats of weatherproof sealant, exterior house paint is perfect for this goal.
Western Red Cedar Flow Hive is a premium option. Advantages of cedar are natural rot resistance and fine timber grain with rich color variation. To maintain a natural timber finish by oiling or staining is recommended.
Western Red Cedar is the most durable and lighter weight in comparison with the Araucaria.
All models presented in these two timbers, except Flow Hive Hybrid – only Araucaria is available.
Flow Frames – what hive width to choose?
Flow Hive Classic and Flow Hive 2 can be chosen with 6 or 7 frames.
6 Frame Flow Hive is compatible with standard 8 frame Langstroth equipment, that is widely used around the world. As here is fewer frames, it’s lighter to lift. This width is optimal for novice beekeeper.
7 Frame Flow Hive is compatible with 10 frame Langstroth equipment. If you live in the region, where the temperature is around freezing for weeks at a time during winter, 7 Frames is better, because it provides additional space for winter stores. And, of course, this width provides you, extra honey!
Which Flow Hive model gives the biggest honey harvest?
One Flow Аrame gives about 6,5lbs (3kg) of honey. Since all Flow beehives use the same capacity frame, honey harvest depends not on the model, but on the number of frames. Thus, 6 Frames Flow Hive 2 or Flow Hive Classic give 40lbs (18kg) of honey from a fully filled frame, and the same hives, but of 7 Flow frames give 44lbs (21kg). Flow Hive Hybrid stands alone. With its help, it is possible to collect up to 20lbs (9kg) of honey from the Flow Frames, and it should be remembered about 4 standard Langstroth frames, which also provides not only honey but wax.
So, one of the two should be chosen: more features or more economy. Briefly:
1. Flow Hive 2 is the most expensive, then Flow Hive Classic goes and Flow Hive Hybrid has the lowest price.
2. Western Red Cedar is more expensive than Araucaria.
3. 6 Frame hive is more expensive than 7 Frame hive (ironically).
Flow Hive 2 review in details
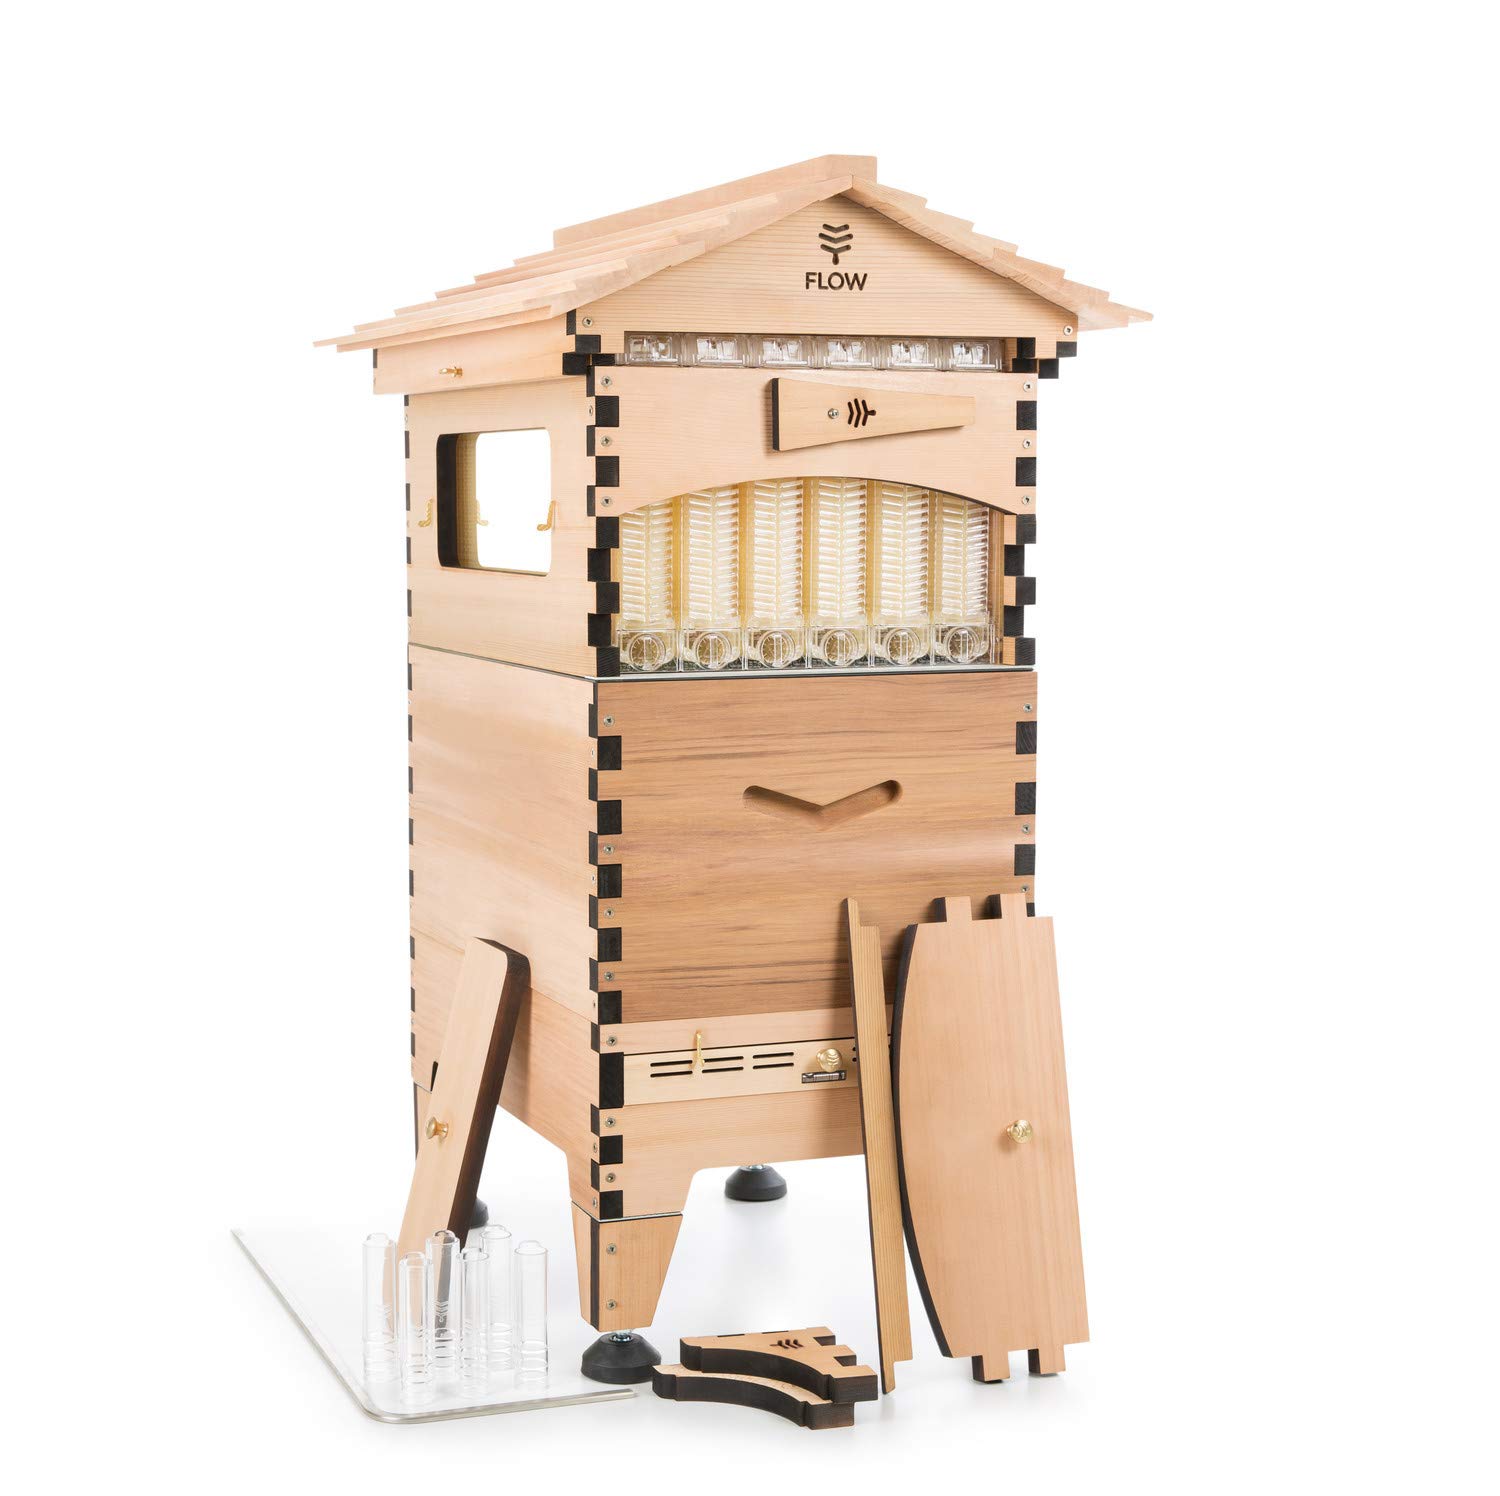
Since there are more functions in the Flow Hive 2, I decided to use it for review. The wood is cedar, the width is 6 Flow Frames. It seems that this is the most popular set of functions and the best price-quality ratio.
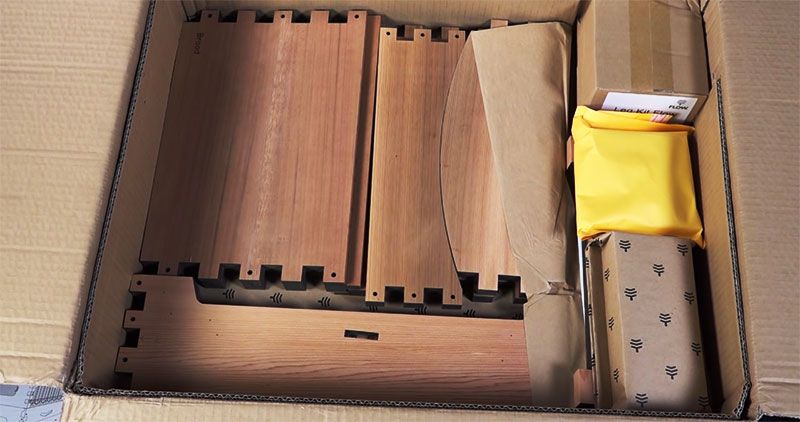
I’ll give you the first-person view of opening it up on what’s inside.
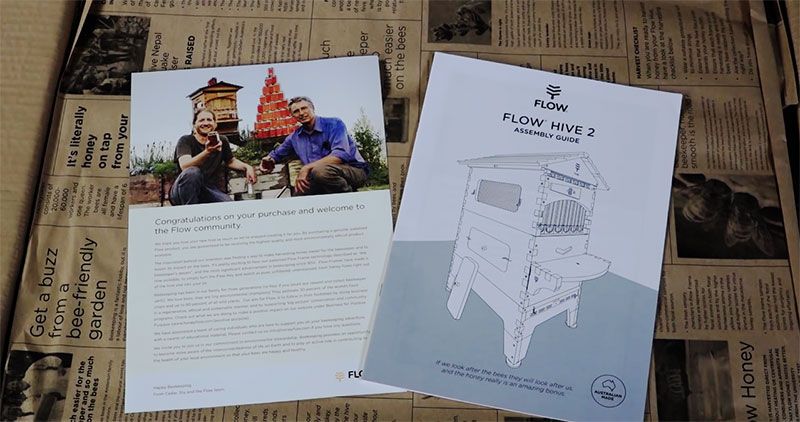
The company wants you to send your bee puns to honeyflow.com – here’s the gradual congratulations letter welcoming you to the Flow Hive group and much-needed instruction manual for your Flow Hive assembly. Everything’s made in Australia.
Then there are some compostable papers with some good articles. I recommend you read them if you have the time.
With this hive you also get the Flow Hive hat with the flow veil, they’re super convenient to hand out to people when you go to talk about your bees.

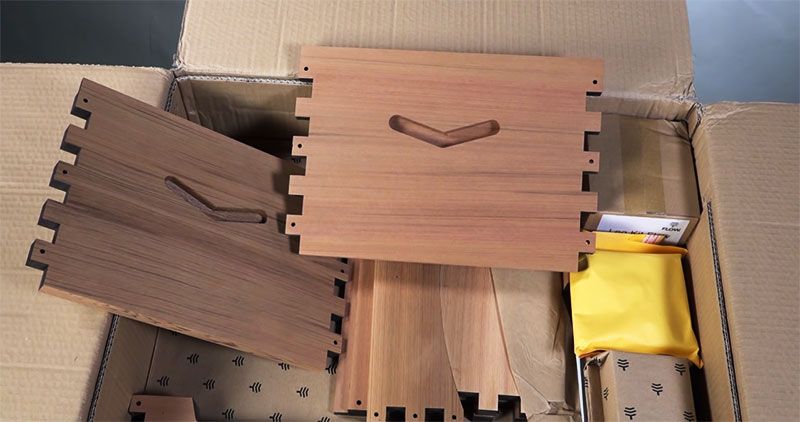
Let’s start at the top.
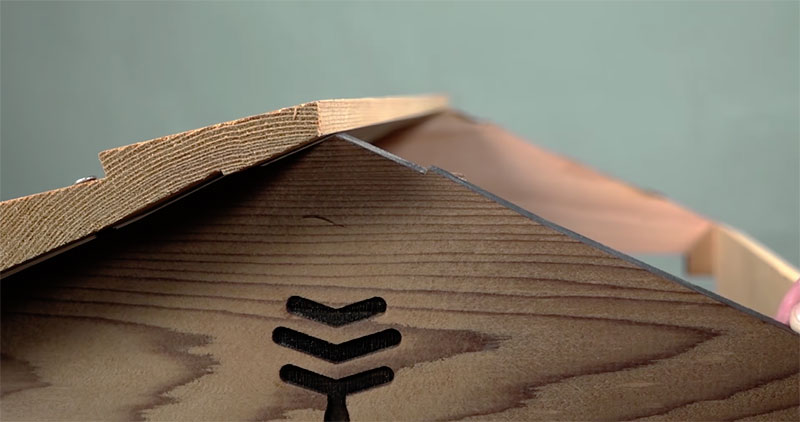
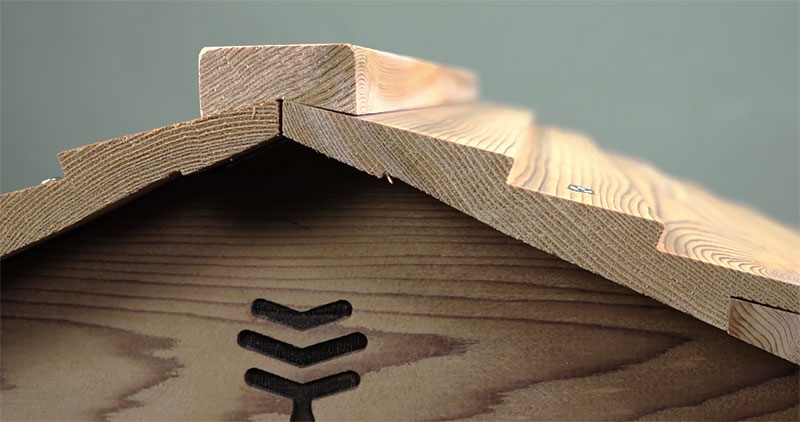
Here are the roof components with the Flow logo that is nicely cut into it. All these wooden parts are high-quality as far as I’m concerned. I’ve put together every kind of Flow Hives that they make and I’ve had great success with them, I really enjoy it. The roof unlike the previous versions that came out this one has little notches built into it and you do not have to assemble the roof panels. These two come in two pieces on each side and then you kind of hand align them and guests. But the alignment grooves are already there so that guesswork is gone and they go right on. I recommend you glue them and screw them down and then what I do I flip them over and run the glue on the inside too.
These are the new thumb screws that go in that will hold your roof to your top box. It overlays the inner cover and actually screws into and grips onto your honey super or if you’re just using the deep box when you’re starting out it’ll do that.
When you first screw top retaining thumbscrew it could be kind of tight but of course, you’re cutting threads into that hole that’s been pre-drilled and once you’ve done that a couple of times it’s much easier. I also recommend that once you find that little indentation on that upper box so you go ahead and drill a little hole to receive that up there.

Then we’re going to get into the instructions. There is a roof alignment block there and again the sandpaper I mentioned and the little tool. If you want to see other videos by honeyflow.com themselves follow this website to honeyflow.com/assembly and you’ll be able to see their guidelines.
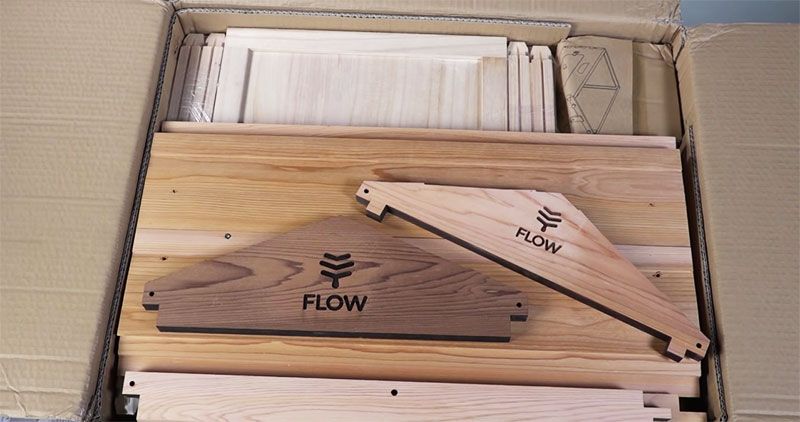
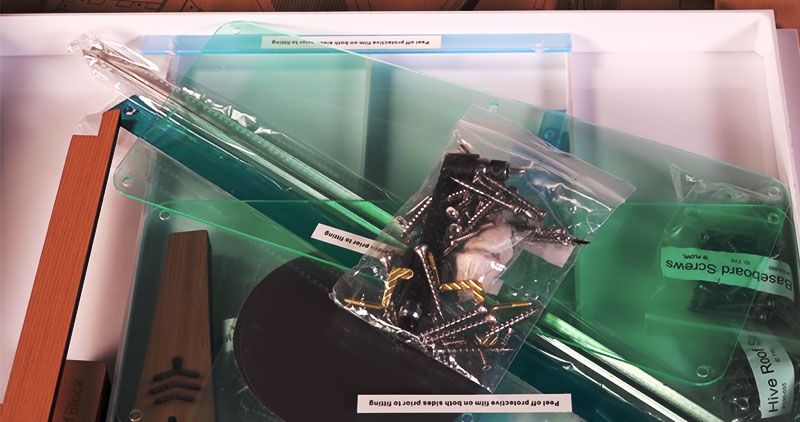
All the components in the box that you need and the Flow Frames themselves are in a separate box, every packet is marked. This is a tray that goes in and these are all the components that come packed in the box in the tray. They even include sandpaper this time. If you an orbital sander and it has little velcro thing on it this is the type of sandpaper that goes on that. There’s even a little tool here. I’m gonna use my own tools but everything is included if you wanted to just use the tools that are in the box.
Here’s the Queen excluder. This is a close-up of the Queen excluder looks kind of open and I think this time for this small Flow Hive I will be using it.
I always put a Queen excluder into the bottom box – if you don’t put that excluder in there your Queen can get up and will possibly lay eggs and develop brood in your Flow Frames – we don’t want that.
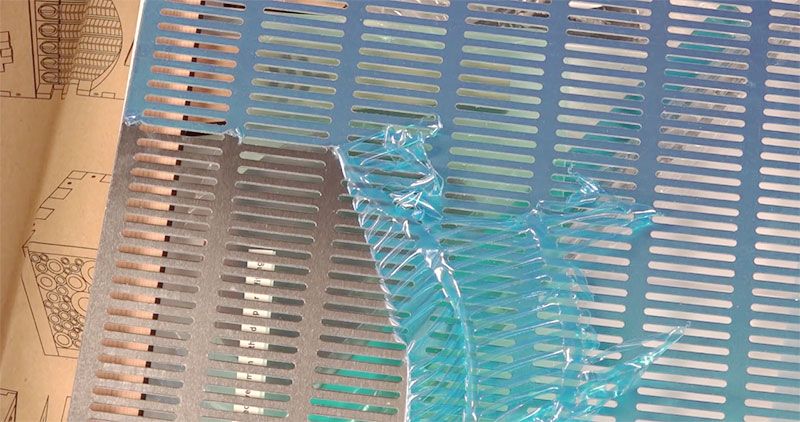
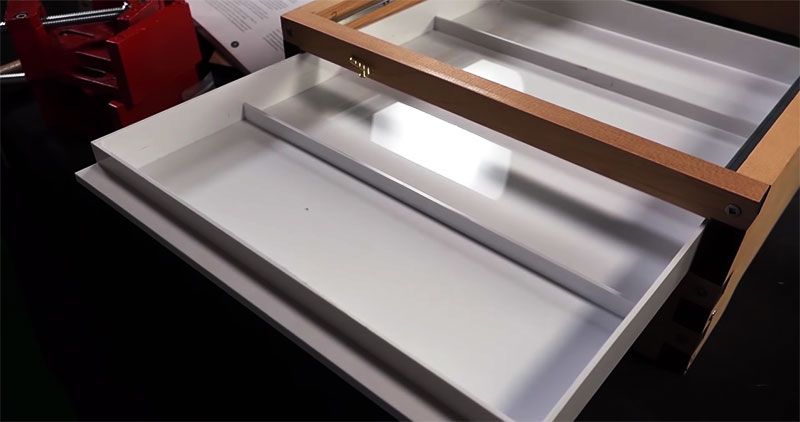
This is the bottom board cover. It’s aluminum and there is a kind of blue tint plastic protection over it that you can have to peel the way that film. This is what it looks like after you peel it away. It’s actually pretty rigid and pretty good and I’m hoping that these openings are too small for bees to go through. Probably talk about that a little bit later but we definitely don’t want bees going through the bottom there and I’ll show you why.
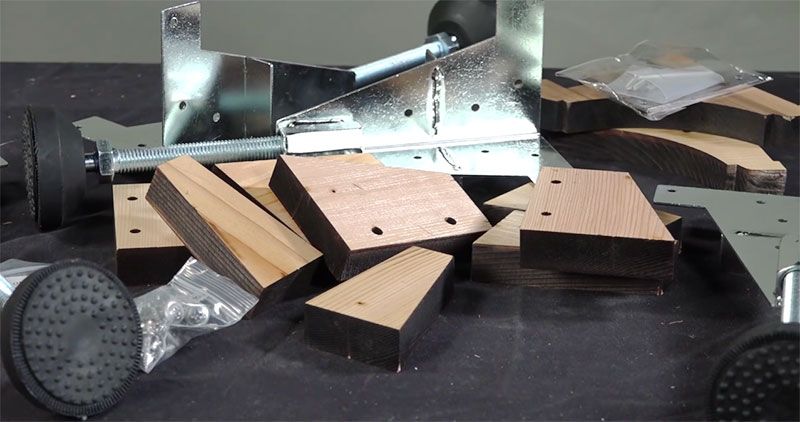
These are all the seated components. Everything is fantastic. The woodwork here absolutely looks flawless. These are laser-cut that’s why the edges are black.
Now, this is the time before you start to put everything together. If you’re gonna personalize the box do it now. Pull these panels out and paint your designs on them – for example, paint your hive or do pyrography on this panel. Some people buy Heat brands to brand their bee boxes but you can get a pyrography kit a lot cheaper.
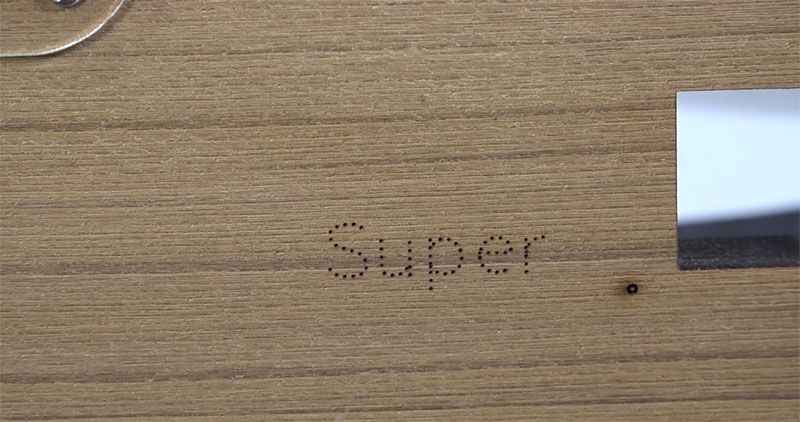
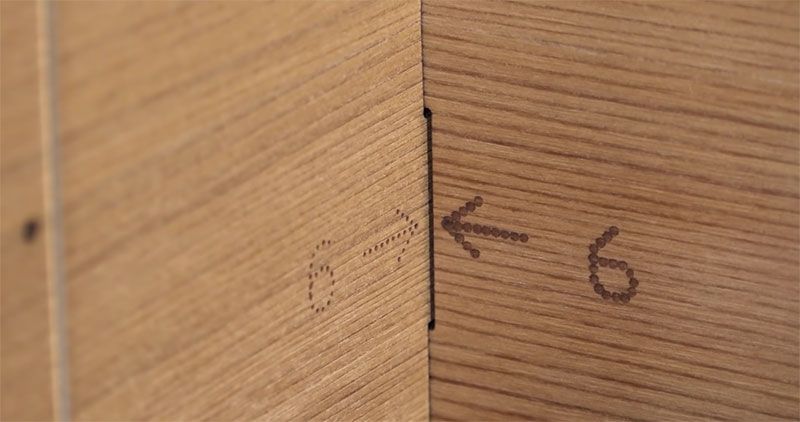
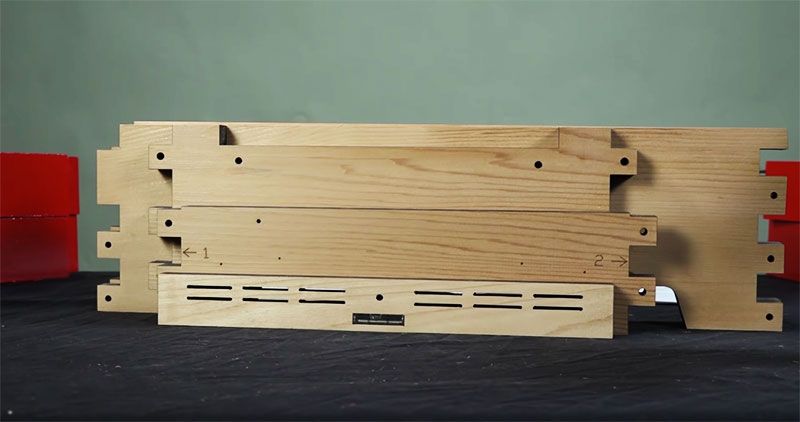
All the components for the base are marked. There are laser etched numbers and identifying names inside each of these panels. So it really takes the guesswork out, but don’t skip over reading those instructions.
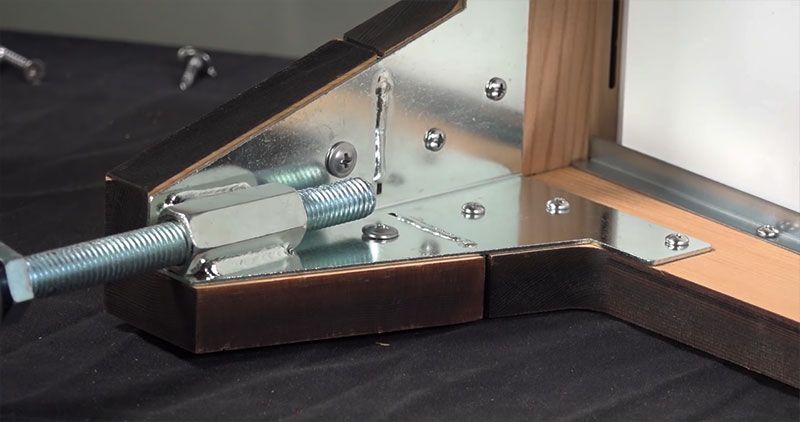
These are the metal components. That is part of that adjustable support system. They’re really well made, heavy-duty and welded up. I was anxious to see it.
Also, notice these bottom pads which are black rubber. They tilt in all directions so that you can also adapt to the uneven ground as well as height adjustment. That’s pretty cool.
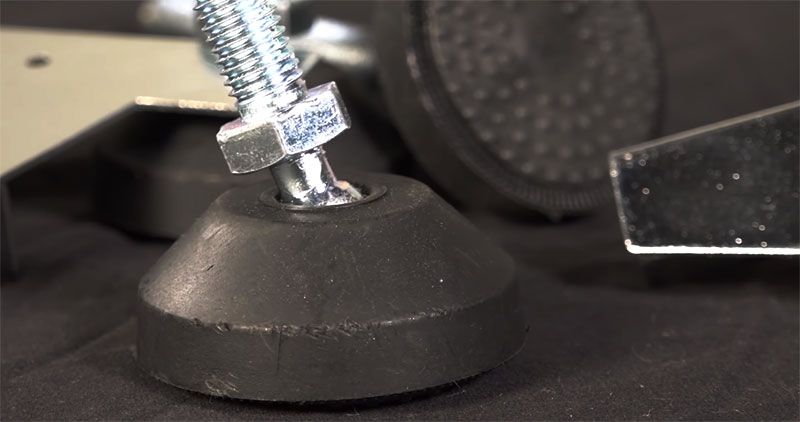
The other thing I liked is the fact that these nuts are really long. So I don’t think you can get enough honey into a Flow Hive that would overwhelm – those supports are nice and strong.
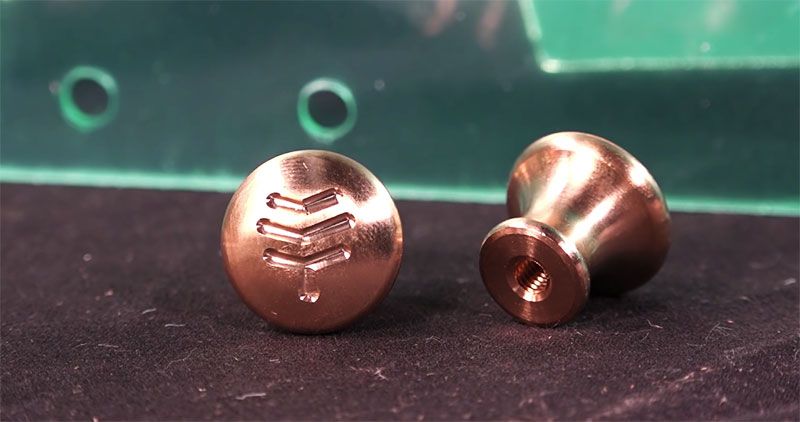
Brass pull knobs that replace the old wooden ones in the Classic Flow Hive that sometimes came out. These are gonna do really well.
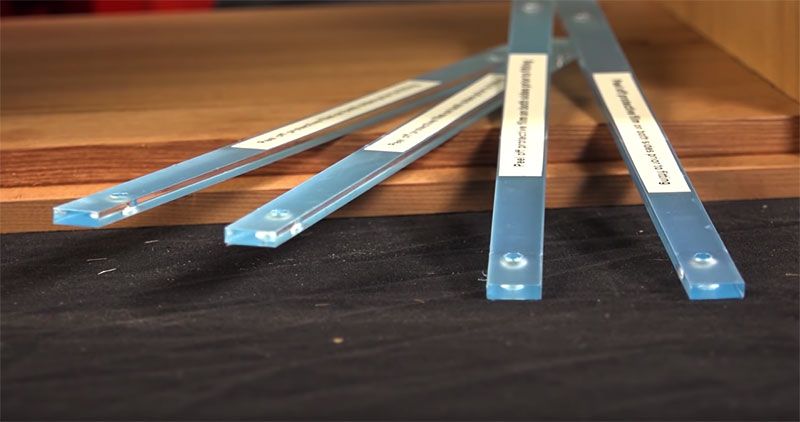
The other reason I guess problems matching up the right components now in the past. These shims that push your Flow Frames together were made out of wood. Now it looks like it’s a clear lucite. These are nice and durable and of course, won’t take expand on moisture or rod. And here it is installed inside. They’re just shims. That goes to the sides and push the flow activated frames together and keep them nice and snug.
Here are the observation windows. They come with a film on both sides of them and one side is tinted green. Don’t forget to pull off the clear one on the other side. You might have to fiddle with that a little while.

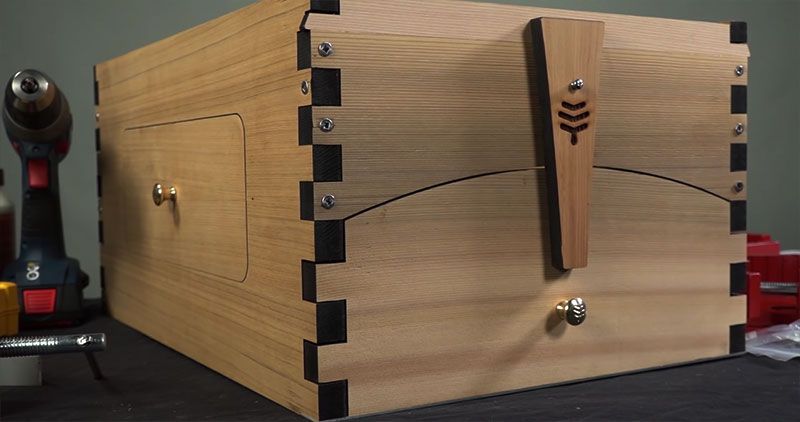
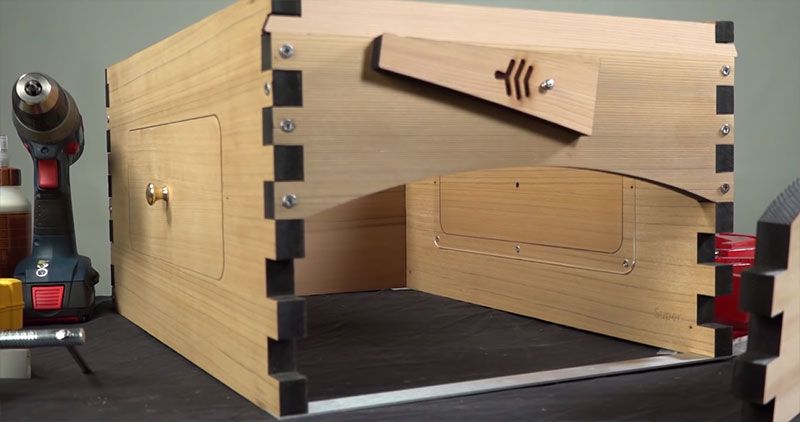
So here it is all together. This is not a super – there’s an access panel on each side we’re showing that here and the nice windows on the inside and pretty similar to the previous versions.
These are the components that go with the support system so this is the bottom. Now they’ve done away with the traditional bottom landing board design.
Here is the landing board is on the tilt. You do have to handhold it right up against it there, but I lined it up with those end joints and that was pretty nice.
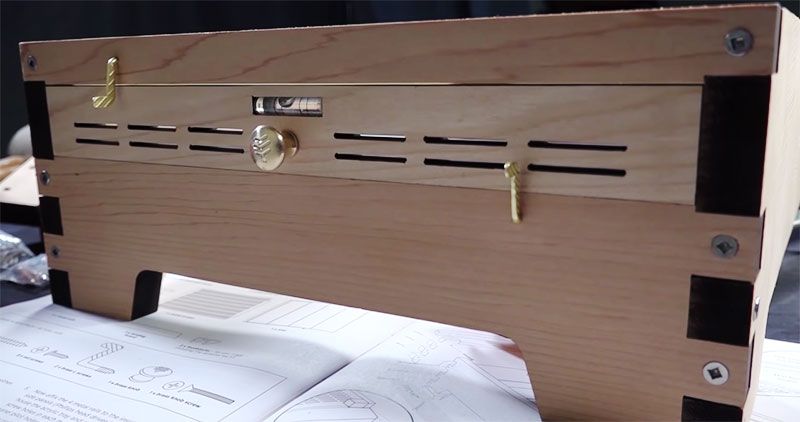
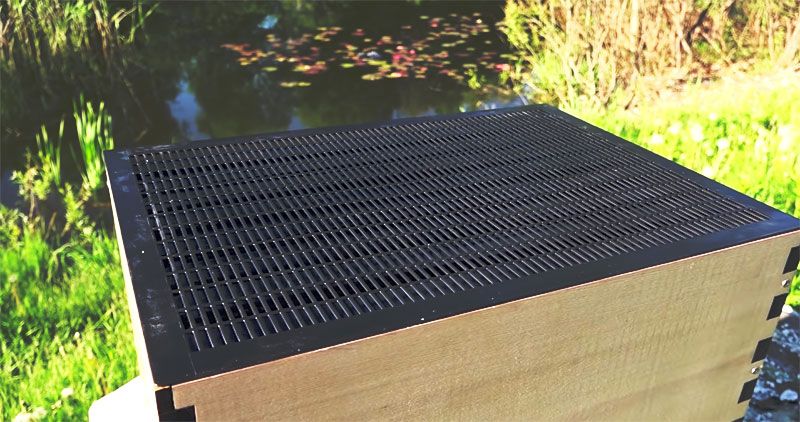
Two screws go in for it. Metal rails that are inside will support the tray that slides in and out. Here’s that leveling indicator that’s built-in and of course the brass knob underneath that goes into that removable vent on the back. What’s about vent – we can flip it over and open for more ventilation or we can remove it all. This is back access to that; the other supports that aluminum bottom board cover.
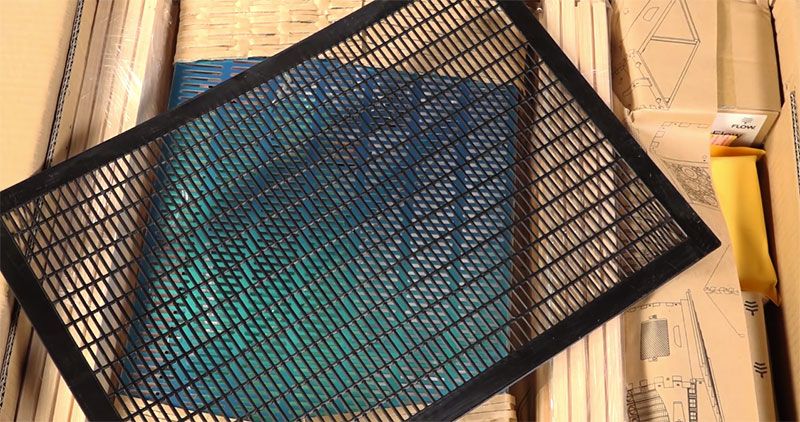
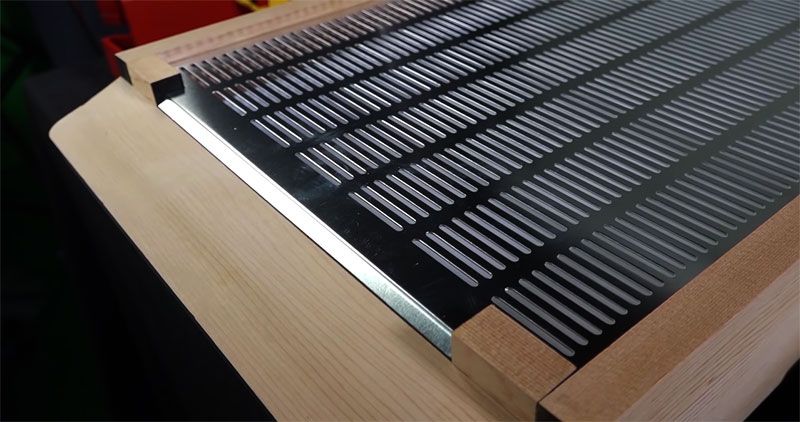
Here’s the sliding tray that is behind the ventilation grate. It’s heavy-duty and thick material. This is where hygienic varroa resistant line of bees will be dropping dead and chewed up varroa.
Just take a look at the fit of that aluminum cover that’s inside on the landing board. It should allow debris and varroa hopefully will fall through this. It overlays that leading edge of the box really nice, I was impressed by the fit the tolerances – they are super tight and along the back to vent nice and snug up against the back there. So if you pull that vent off the back nothing’s going to come in there and access your colony through the back, there will be no sneak for wasps and hornets.
The landing board matches the width of that base support and it tilts down so rainwater stuff gets shed.
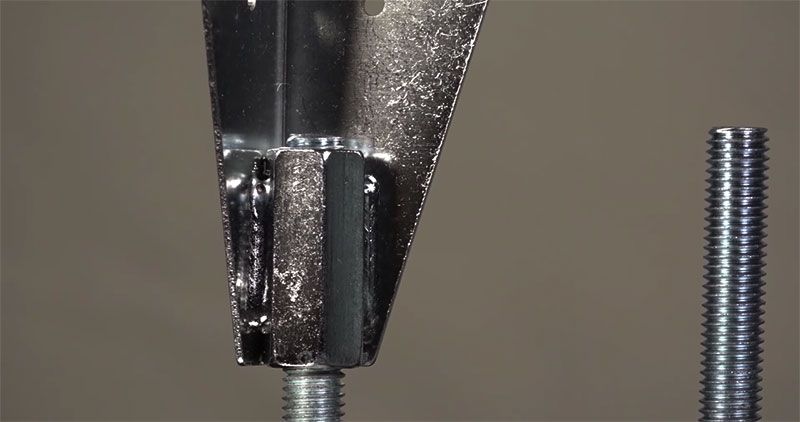
Adjustable stand system is optional. It comes with a lot of wood and there two pieces for each corner. You screw them on and put them together. Those wooden parts are cosmetic because all the structural support is coming from the metal itself.
The threaded components of this are really strong, I just can’t see this being overwhelmed. It is plenty stout for even a beehive that’s loaded with honey. Here is the interior view of how it’s connected and how it’s threaded through. These are gonna be sheltered pretty much from the weather.
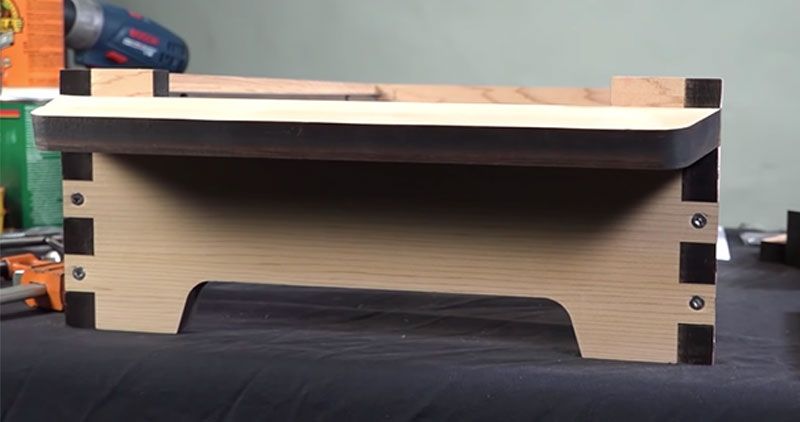
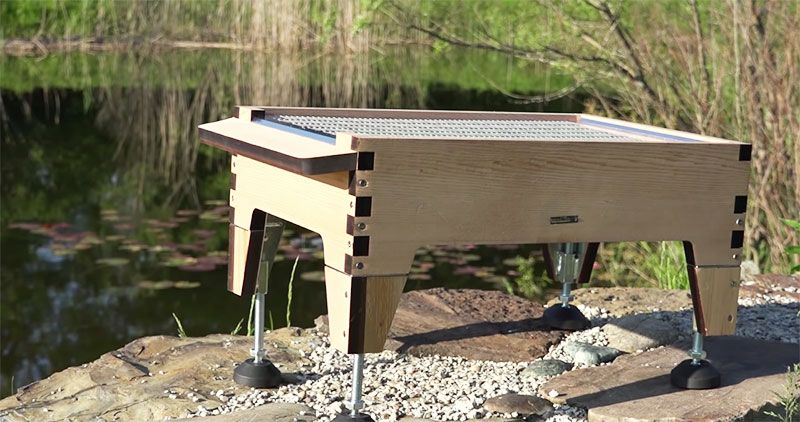
I chose this stone bench as a test thing to level it up and show you how it’s going to look. Adjustment base is optional, but I recommend you get it though because now you can put your hive anywhere and see the level right on center. Center side-to-side is critical, front to back not so critical when you’re going to extract honey. So, it is nice to be able to tilt that just by adjusting the screws.
On the image the side level is marked on the level when it is in the tilted back position so that you can extract honey, that’s why I’m showing it this way. If your hive is tilted front to back that does not impact the way your bees are gonna create comb.
Queen excluder:
The honey super with the Flow Frames installed and this is pretty tidy. The system is much like the other Flow Hives that have come out. The Flow Frames themselves are unchanged so they activate the same the components are interchangeable.
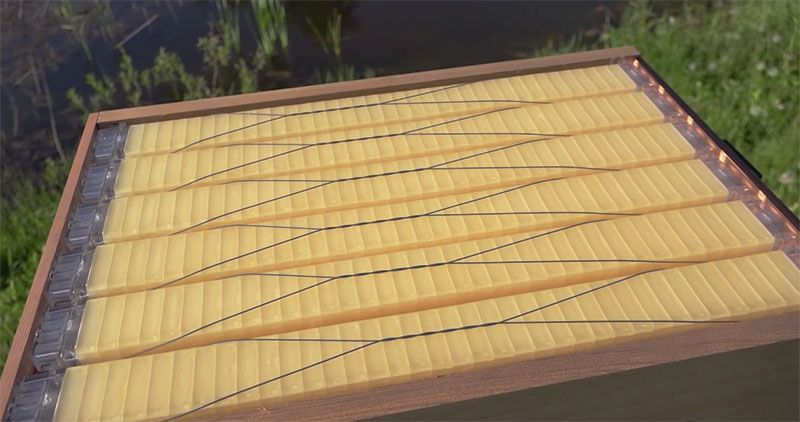
The adjustment screw here on the back so you can slide it to the back to make sure that they’re nice and snug there to eliminate bee space and make sure that they all line up correctly.
The Flow super has the side panel access. Now we’ve got that nice thick inner cover with a plug that you can cover up or remove it to allow ventilation for the bees to have access. You can also put a feeder up there. Everything is improved materially, the thicknesses are nice, the fit is flawless.
The flow super has the side panel access. Now we’ve got that nice thick inner cover with a plug that you can cover up or remove it to allow ventilation for the bees to have access. You can also put a feeder up there. Everything is improved materially, the thicknesses are nice, the fit is flawless.
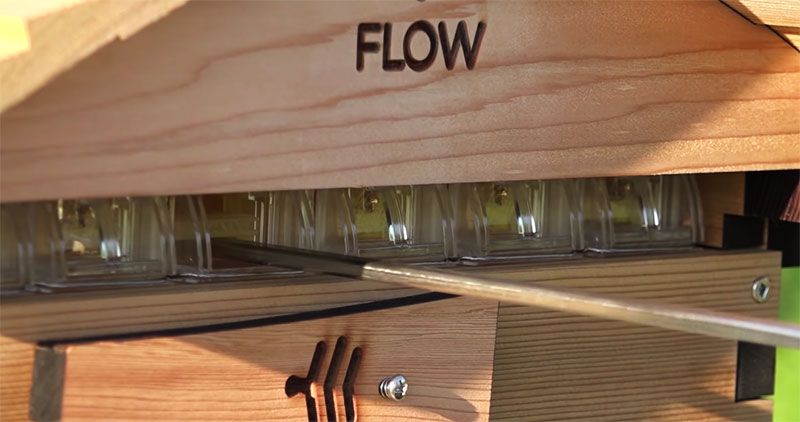
When you need to access just turn the lock and pull that panel out. In Flow Hive 2 this panel also acts as the shelf for extracting honey.
To extract honey when Flow Frames are full you have to remove the upper cover and to put the actuator in which is just a stainless steel bar you pull the plug out. Then you put in your tube for extraction and let the honey run out. Once you see the diameter of that tube not being filled with honey as it’s draining out just push it the rest of the way in and drain the rest of the honey and that prevents overflow.
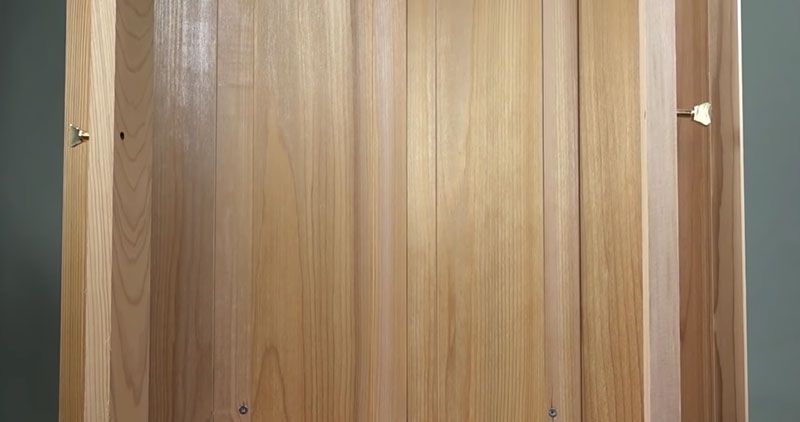
Here is a general view of the assembled Flow Hive. Everything is improved materially, the thicknesses are nice, the fit is flawless, the grain of the cedar wood is fantastic. I couldn’t imagine better wood than this. Keep in mind that you can put a finish on it but it’s not required because this is cedar and cedar it’s naturally weather resistant.
We don’t even have bees in this hive yet but as of my posting of this Flow Hive reviews the bees are already inspecting it and we’re good two primes warm season. I put a swarm commander in there and I’m expecting possibly a volunteer swarm to just move into beehive on their own – we have lots of bees in the area.
Bees already coming to inspect this hive again as of this morning. I have lots of scouts checking this out so I might just lookout and have a bee colony move in. I have lots of hives that are ready to swarm right now and I think they’re gonna find the Flow Hive too to be a pretty favorable environment.
Flow Hive problems
To tell the truth, I didn’t notice a lot of cons or problems of Flow Hive. Of course, one of the main Flow Hive problems is its price, we are talking only about functionality. But there are some inconveniences and shortcomings; I’ll tell you to address these issues.
1. Bees, oddly enough.
Extracting honey without an extractor attracts bees. Once honey begins to drain from the tube from Flow frames, sweet tooth as bees or wasps all over it. They create a lot of inconveniences.
The tube is opened and honey simply drips down with long drop. It’s fascinating, but dig insects out of the fresh honey isn’t the idea of a good time.
But there is a solution. This is my idea of a modified tube. I got food grade 90-degree elbows and I’ve put them together to make my own method for extracting the honey from the Flow Hive. This would just come out and drip into an open jar. I found that by adding the elbow and extending the tubes. I can put it through a recap mason jar lid. I use these on all my Flow Hives and the reason I do that is that when I put these on a jar and I open up the pop-top on that it is perfectly fit for the tubes that come out of your Flow Frames. So, you don’t have to worry about any other bees or wasps or anything else getting into your honey. You can get as much as half a gallon from a Flow Frame, so you want to ideally put. If you’re gonna walk away from it put a half-gallon jug out there with a recap mason jar lid on it. Just let it drain right in and you can go about your business and work on other hives.
2. Assembly is really easy, it’s like Ikea in the beekeeping 🙂 But some beekeepers have problems of the corner is not squared off, especially when the wood is deformed after long non-use of the unassembled hive.
Red corner clamps are my solution. They make sure to hold all of the joints at a perfect 90 degree. I don’t know how I ever get along without these aluminum corner blocks. I use them for all of my woodenware and it’s called the Can-Do Clamps.
You don’t have to guess about that 90 degrees, and you can easily glue things up and put the screws in.
I use the corner clamps to keep the 90 degrees and I use a bar clamp to draw them and close, then I put the screws in.
I think part clamps you can get just about anywhere. Of course, a power drill always verifies your corners are 90 by putting that 90-degree square in there and they’re perfect. Leave them sat for a couple hours till the glue takes. Then I run the screws in and we’re good to go.
Always double-check just like measuring twice cutting once. We’re not cutting anything here, I did not have to shape or modify anything. All the parts went together absolutely perfectly.
3. Bees are ignoring Flow Frames.
Yes, that might be the case.
The bees were inspecting the Flow Frames but didn’t produce honey in it. Was it problematic bees? No, because after installation the second box between the bottom brood and Flow Frames they filled with the honey all the frames in it. Even when usual frames became full, the bees still miss their attention on Flow Frames and don’t store any honey in it.
This can happen especially if you don’t have active bees in your area. Also, the behavior of some bee breeds to the Flow Frames has not yet been tested as well. Let me remind you that the beehive is being developed in Australia for the European honey bee – Apis Mellifera and the local bees are slightly different from their relatives, even of the same breed. Some bees, as African bees, are ignoring plastic foundations. Therefore, compatibility with other honeybee types has already been tested directly by beekeepers who purchase the beehive in all corners of the world.
Here are the solutions.
Firstly, I extremely recommend you to find local beekeepers and ask them for advice. To understand the nature of problems, one needs to study bee behavior in the Flow Hive, how do they build combs, etc. – only experienced beekeeper can handle it.
Secondly, apply wax to the Flow Frames to encourage a quick uptake – perhaps, bees don’t like plastic foundation.
Keep in mind, that using any additional boxes (Super or Brood) can delay Flow Frames uptake. But if you decide to use it, I nevertheless recommend use the Acorn plastic frames which I’ve been getting into over the last couple of years and I love these. They’re triple dipped with wax and my bees really go after them and draw out the comb righter way. We recently had a bear tear apart some hives and the wax plastic foundation held up the best of any of them. The wooden foundation just gets torn apart. I’ve also used Mann Lake, Acorn and Pierco frames. But I recommend you Acorn frames because it deforms less and the bees take to Acorn frames better with the heavy wax coating.